Introduction
Shark Exchange has integrated the TradingView chart into the trading interface. This means you no longer need to open the standard order form to trade — you can open positions, set your exit points, and manage everything by clicking and dragging directly on the price chart.
1. Opening a Position from the Chart
This lets you buy or sell an asset straight from the chart, without filling out the usual order form.
Steps
Choose the coin/asset you want to trade from the top of the screen.
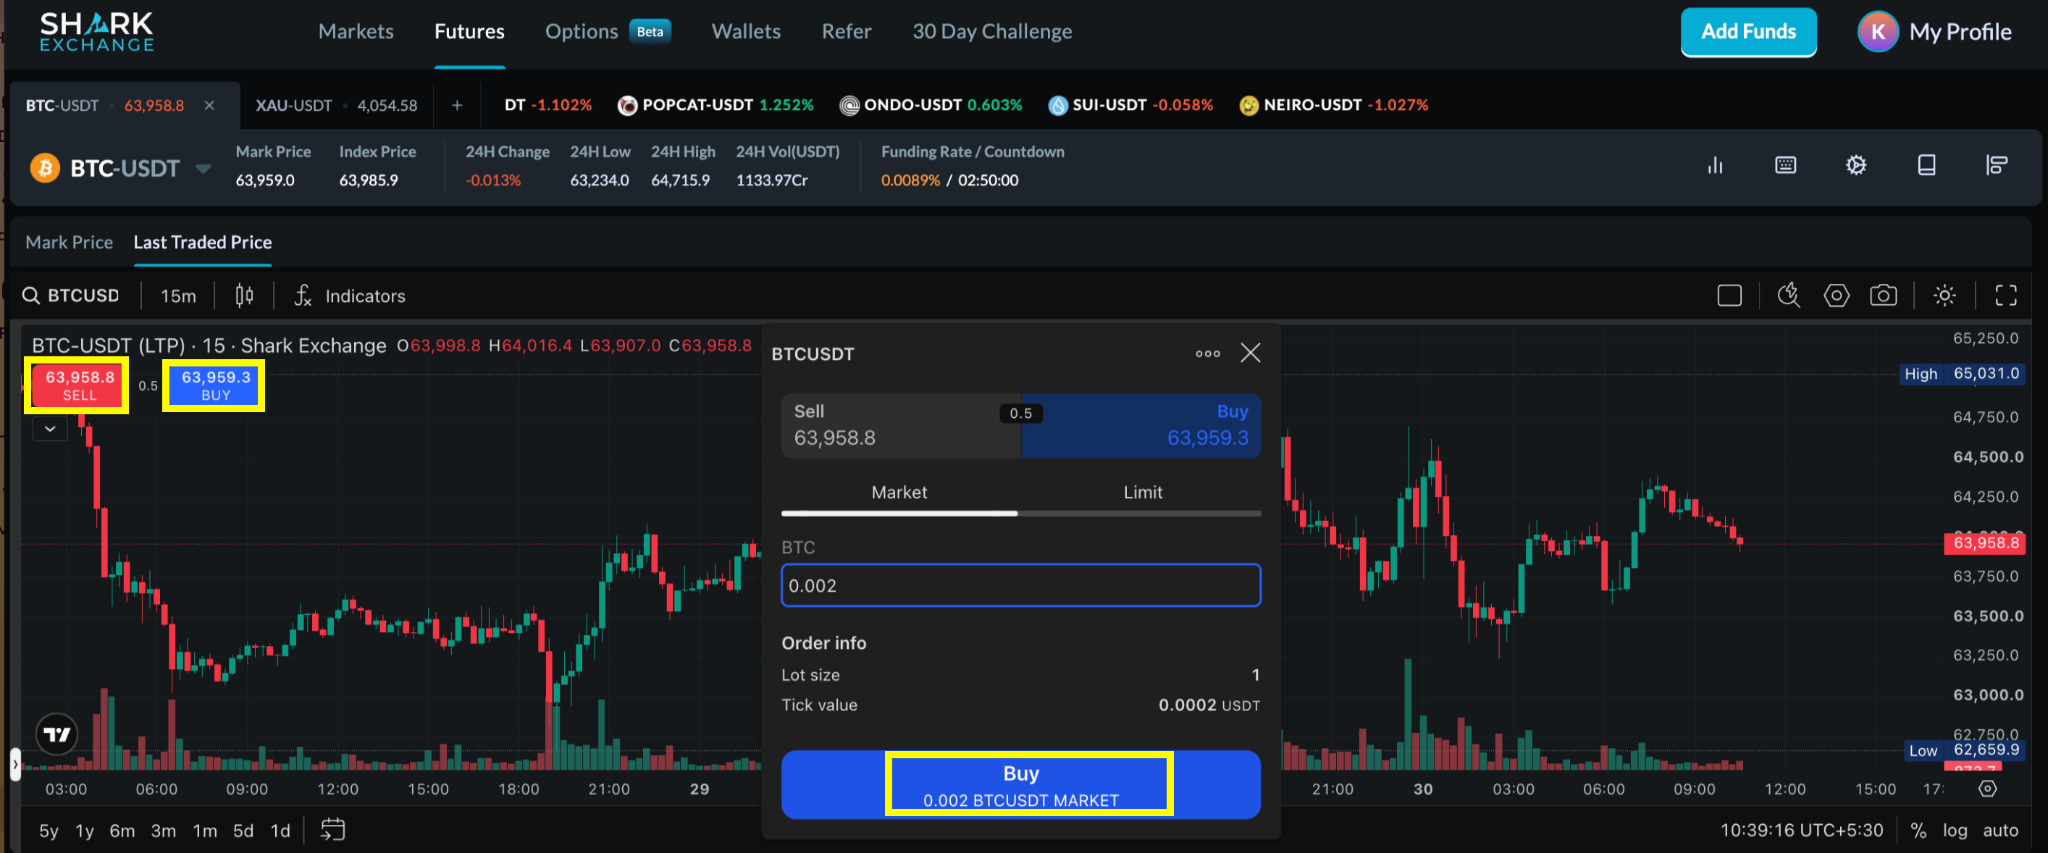
Look at the top-left corner of the chart — you'll see two buttons: Buy and Sell.
Click Buy or sell as per your choice.
A pop-up window will appear. Here you choose:
Order Type — Market (executes immediately at the current price
Quantity — how much of the asset you want to trade
Click Confirm to place the order(Buy/sell).
2. Managing an Open Position (Take Profit & Stop Loss)
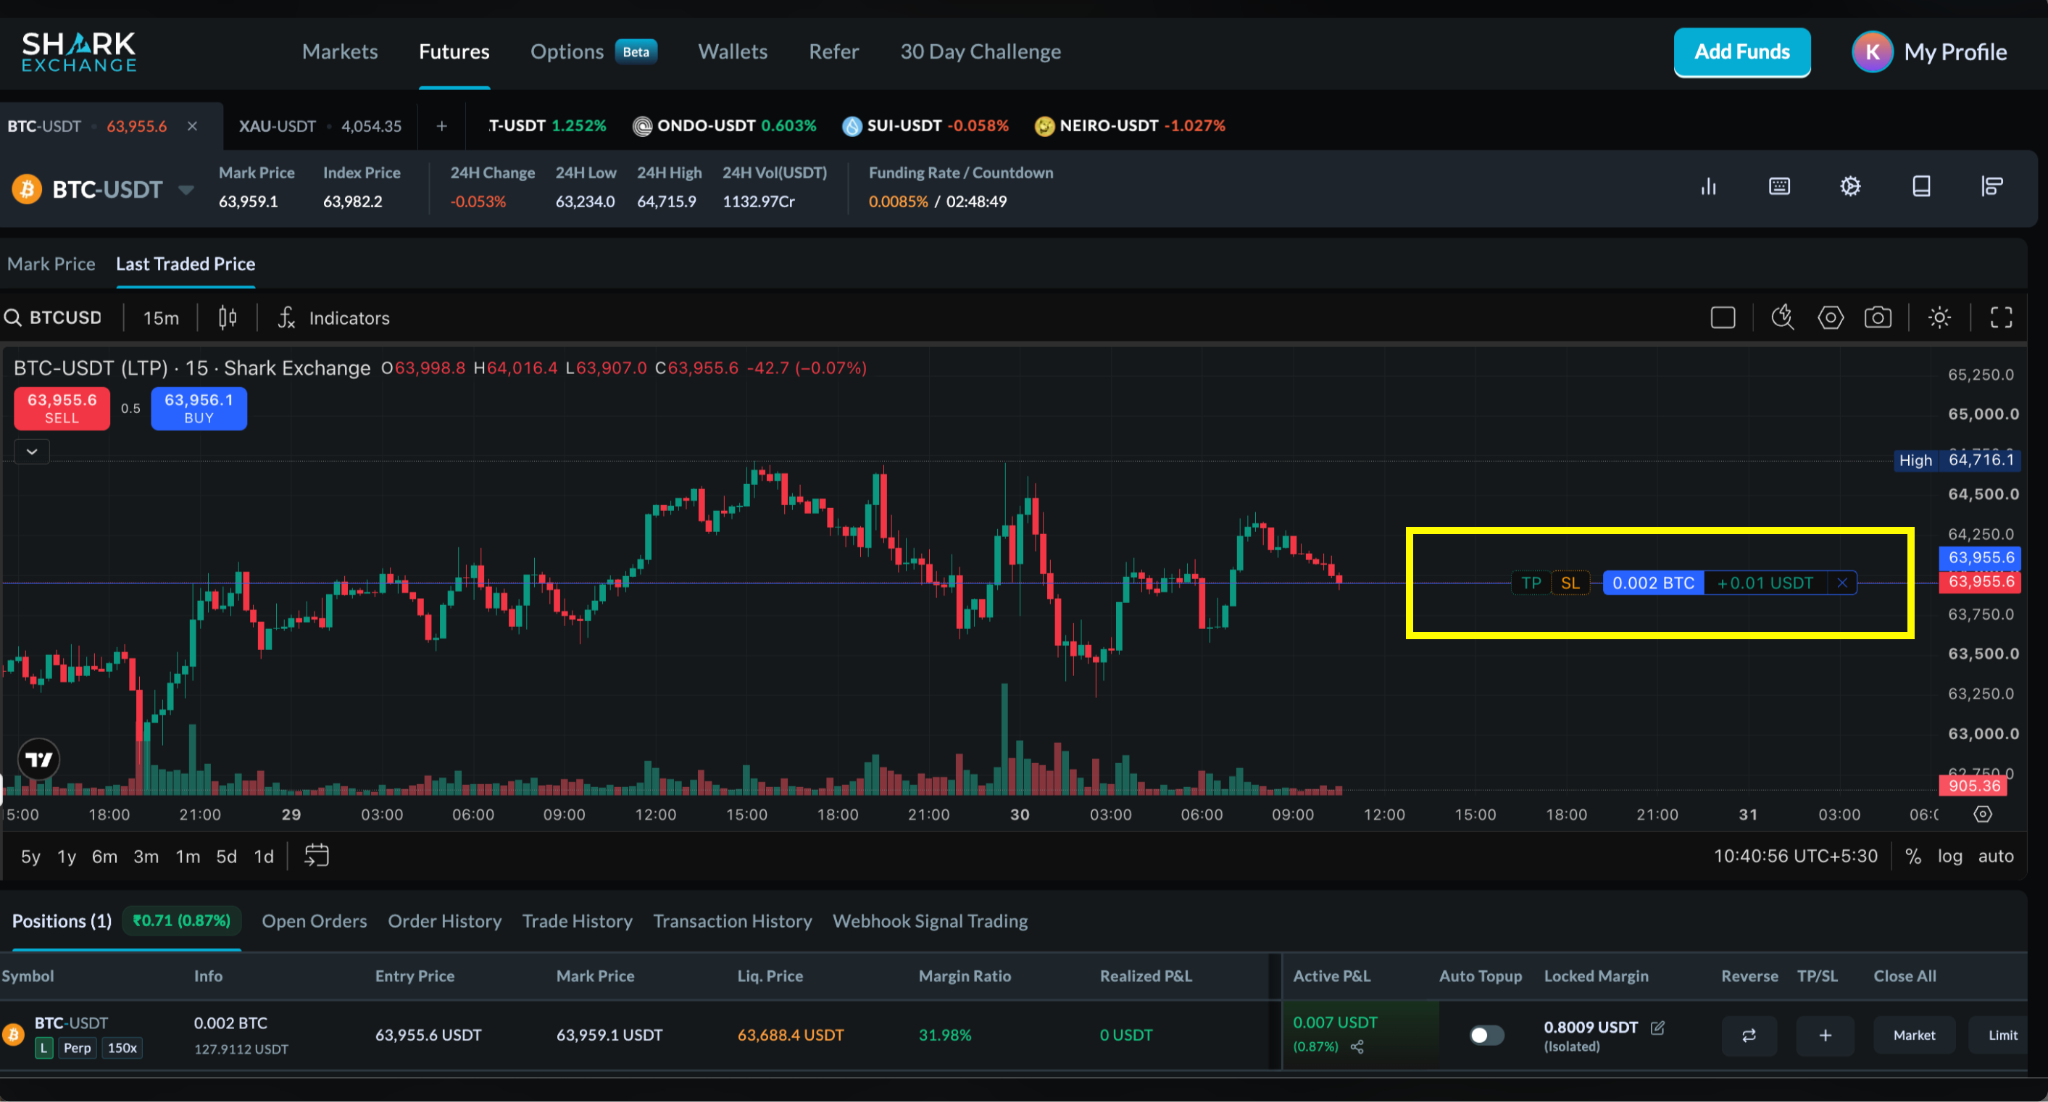
Once your position is open, two horizontal lines can appear on the chart:
Take Profit (TP) — the price at which your position will automatically close in profit
Stop Loss (SL) — the price at which your position will automatically close to limit your loss
How to adjust TP or SL
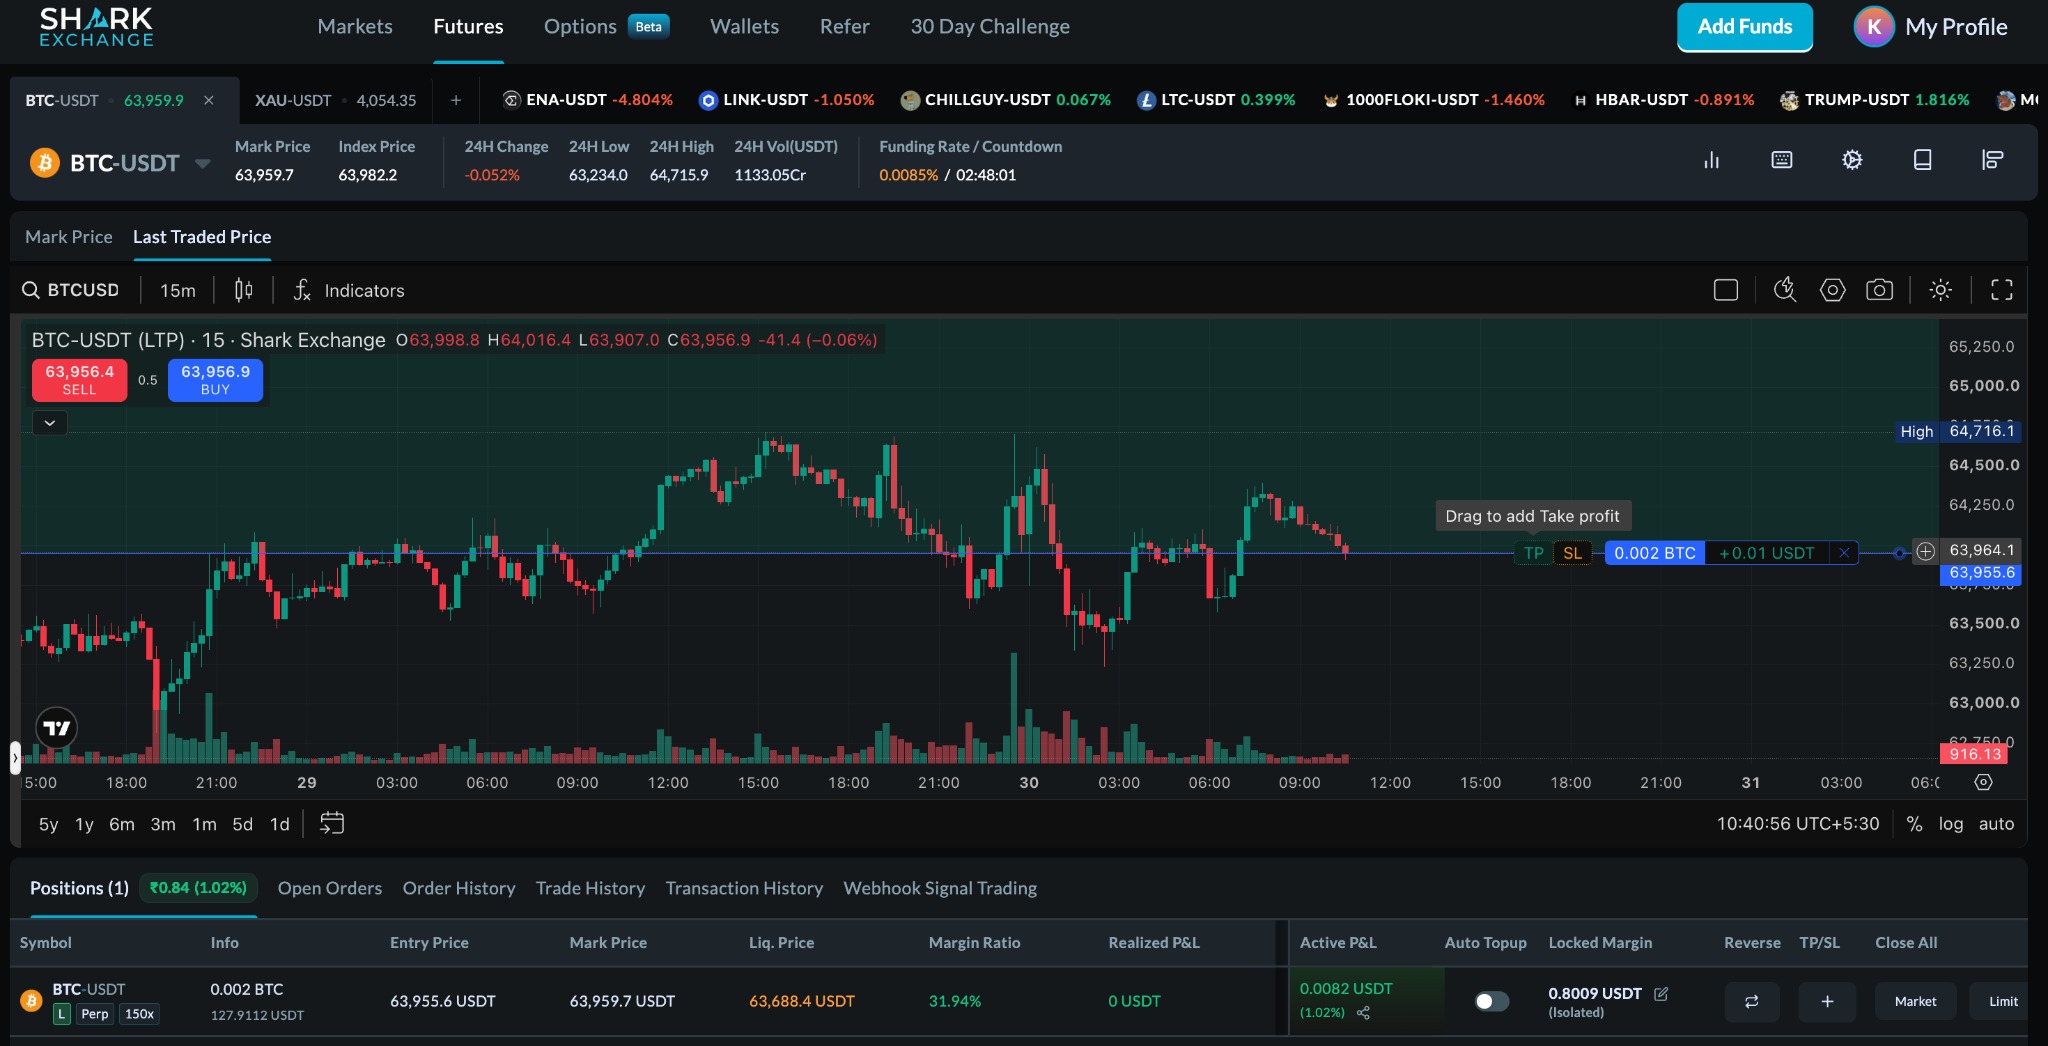
Click and hold the TP or SL line on the chart.
Drag it up or down to your new target price.
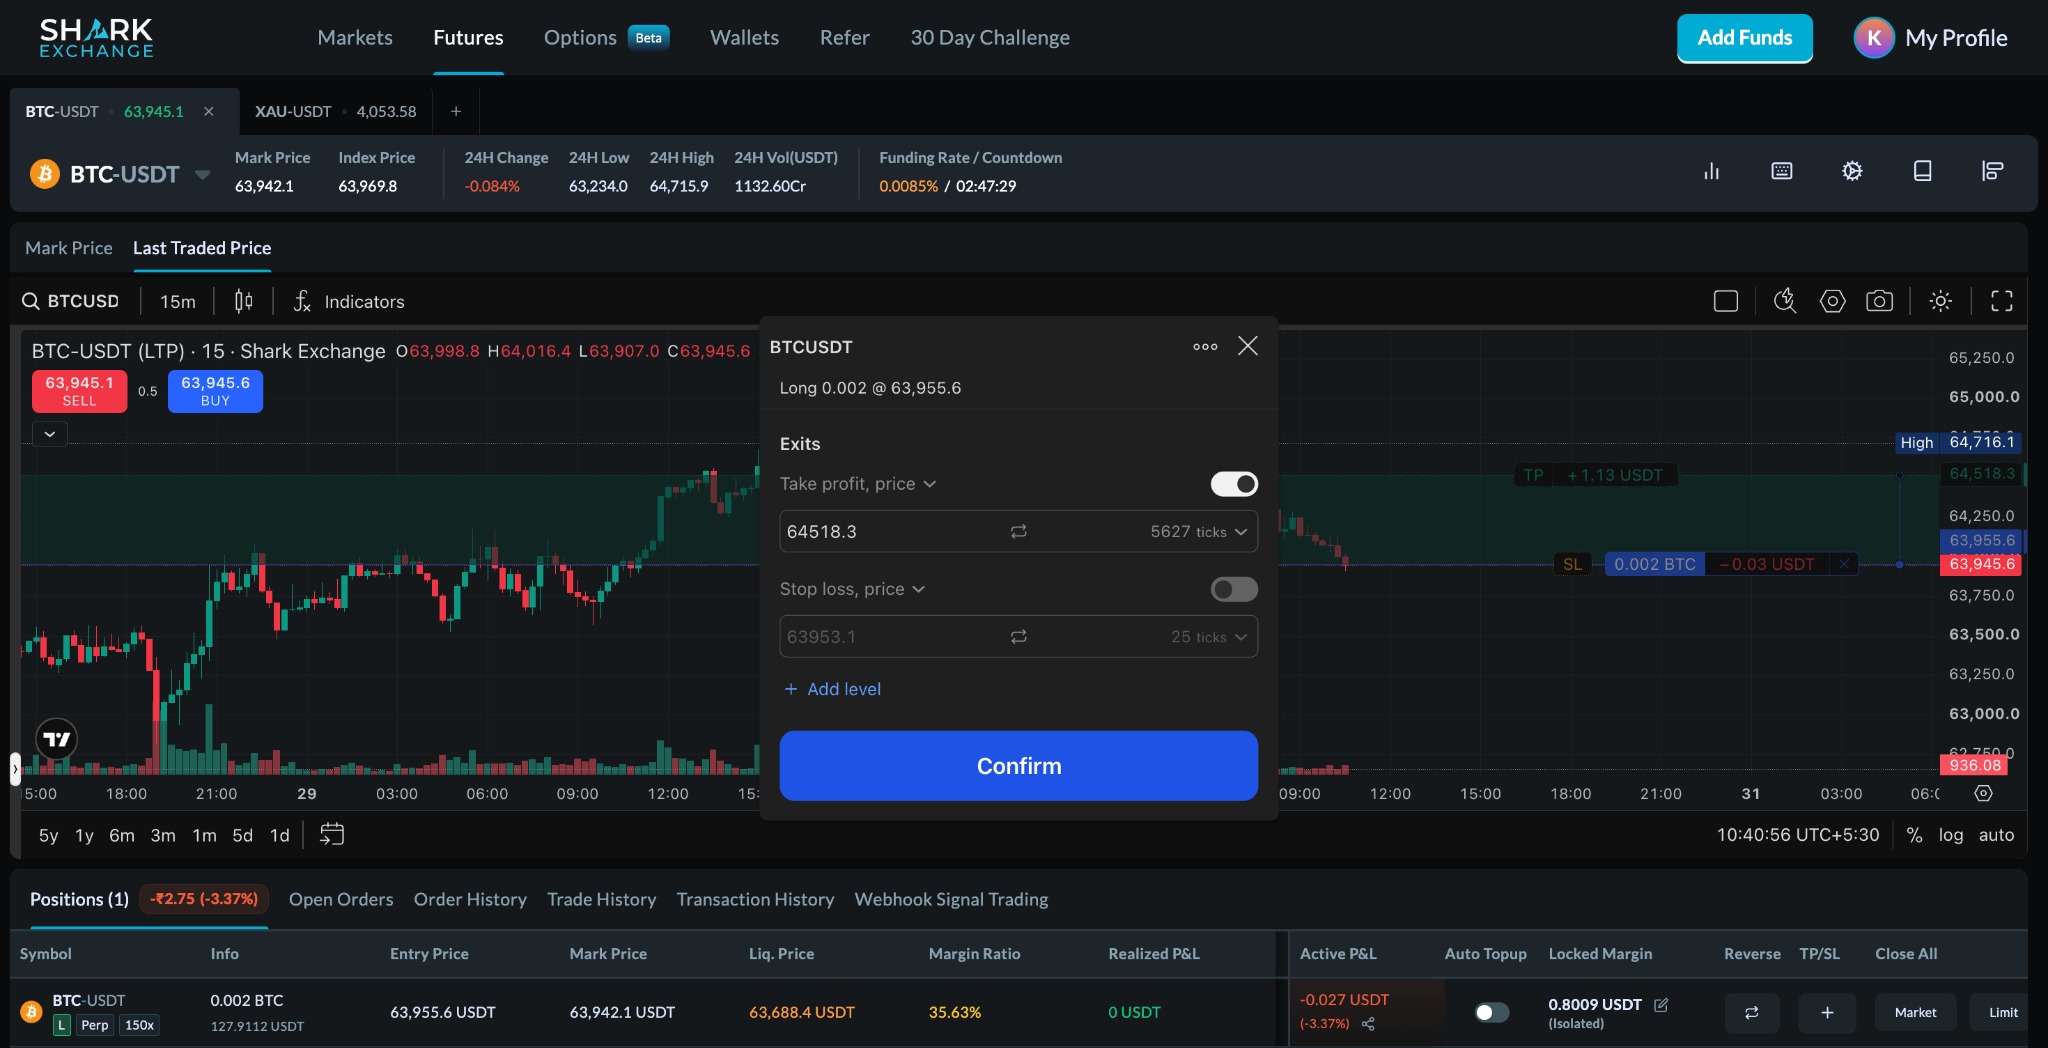
Release the mouse button — a confirmation window will pop up showing the new price.
Check the price is correct, then click Confirm.
Check the price is correct, then click Confirm.
Cancelling an Order or Closing a Position
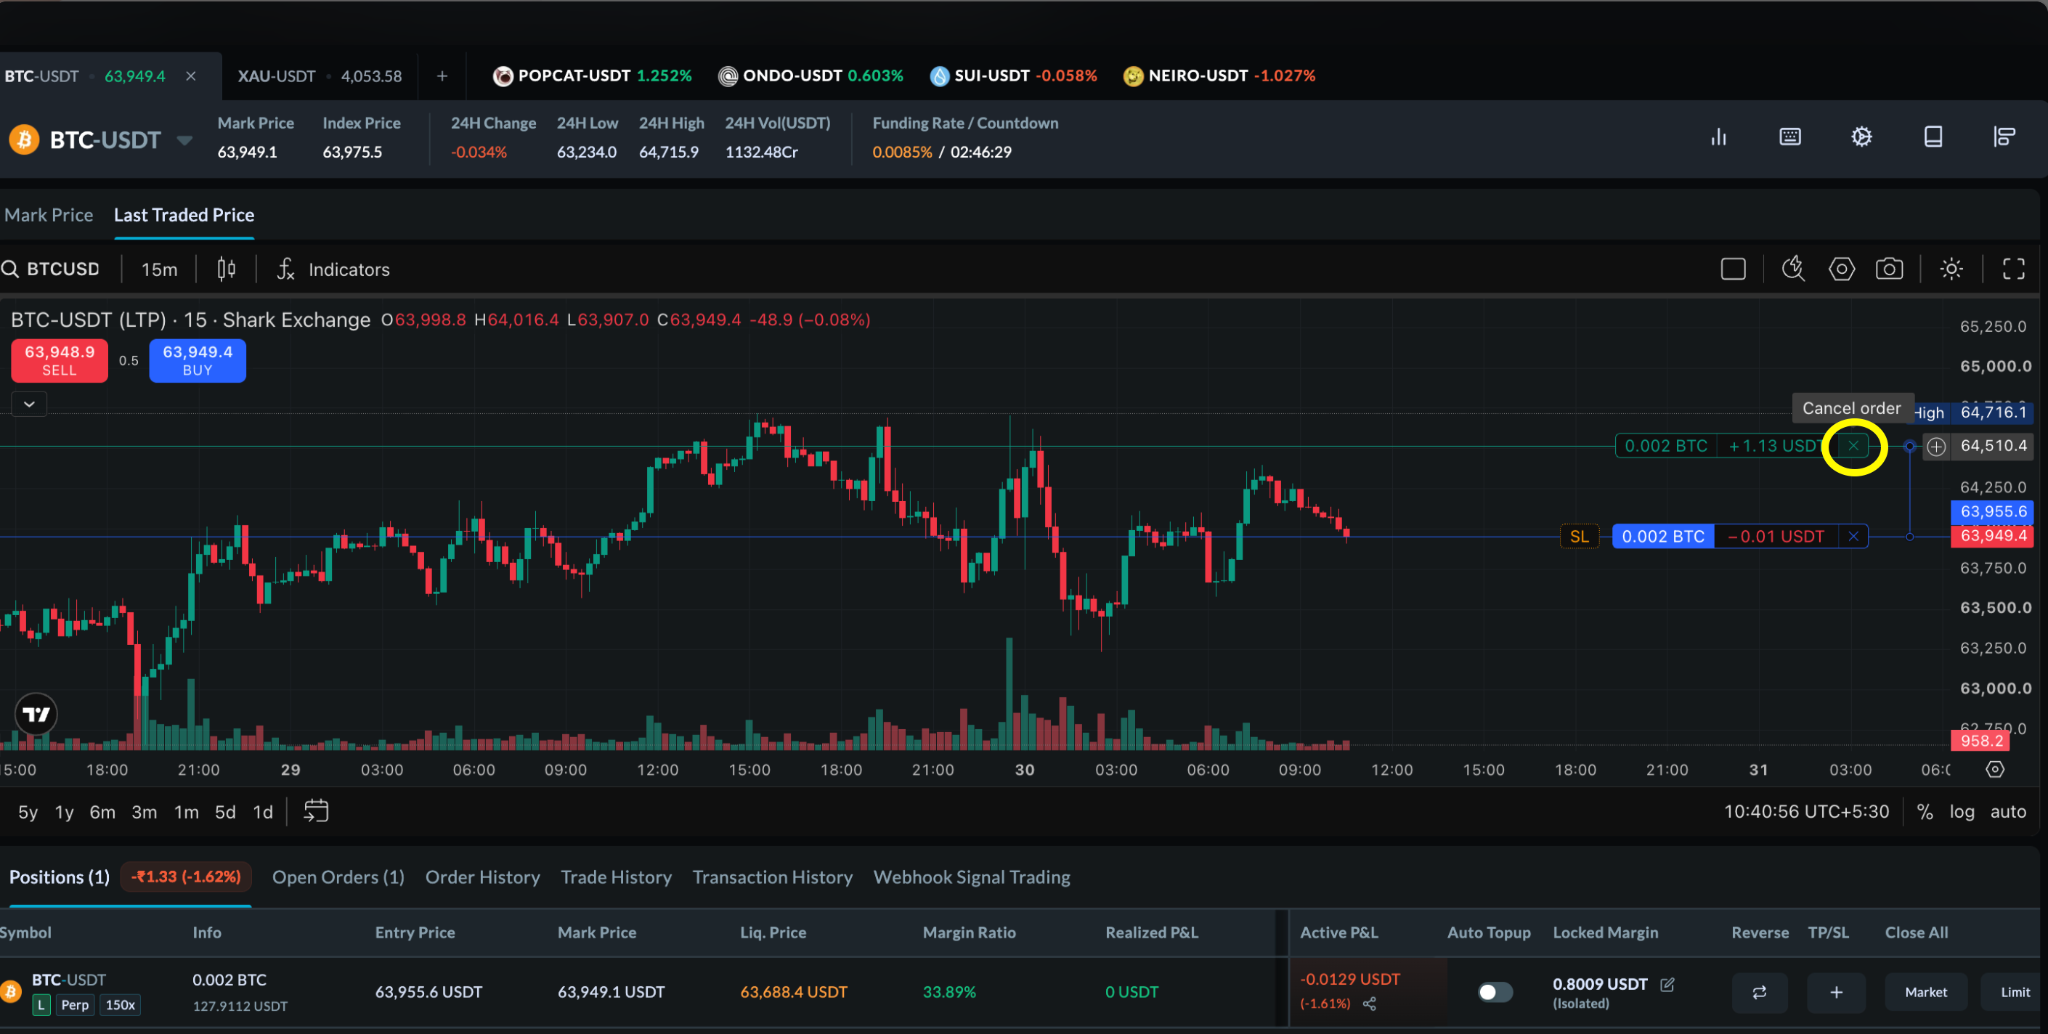
To remove a TP or SL order: click the cross button on the right-hand side of the chart, then confirm.
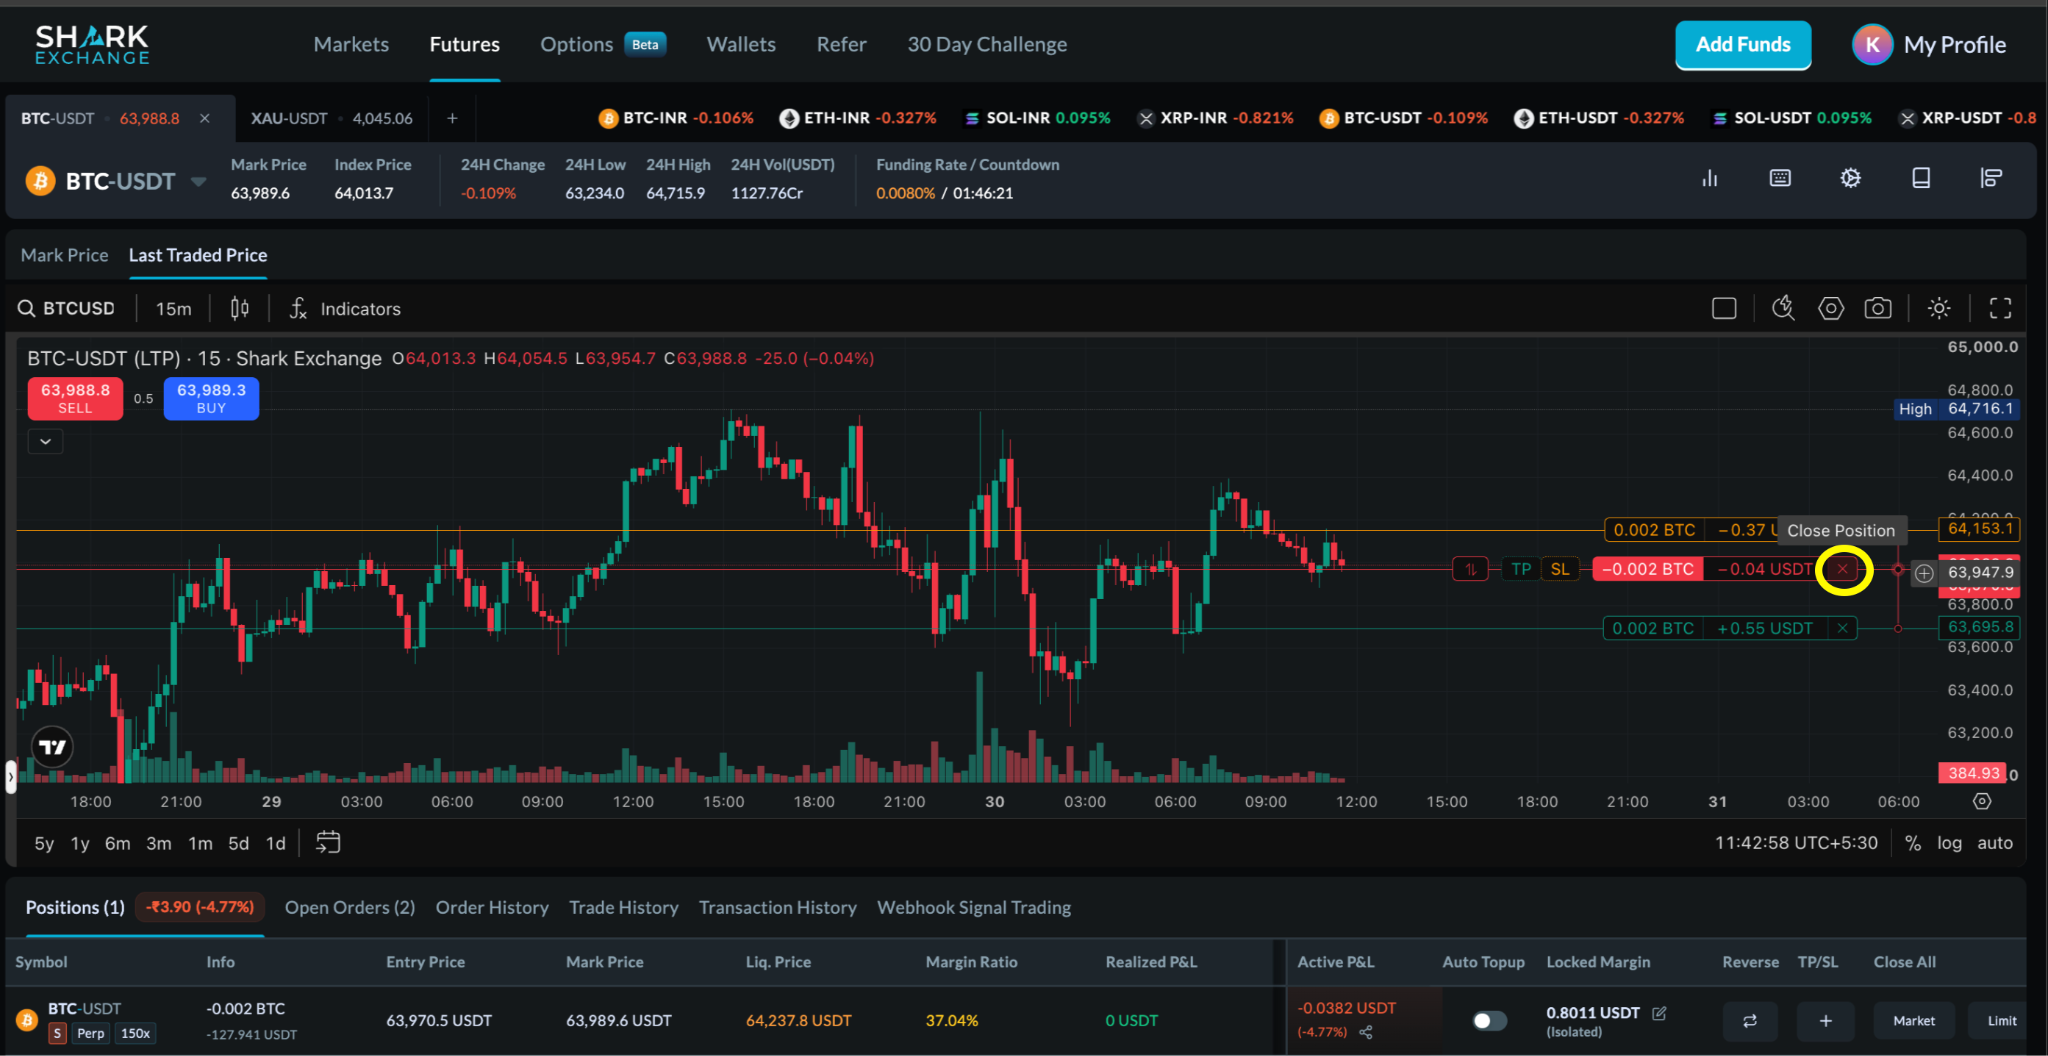
To close your entire position immediately: click the cross button on the right-hand side of the chart, then confirm.
3. Reversing a Position
Reversing a position flips your trade direction instantly — for example, turning a Long (Buy) into a Short (Sell) — without manually closing and reopening it.
Steps to Enable Reverse Position
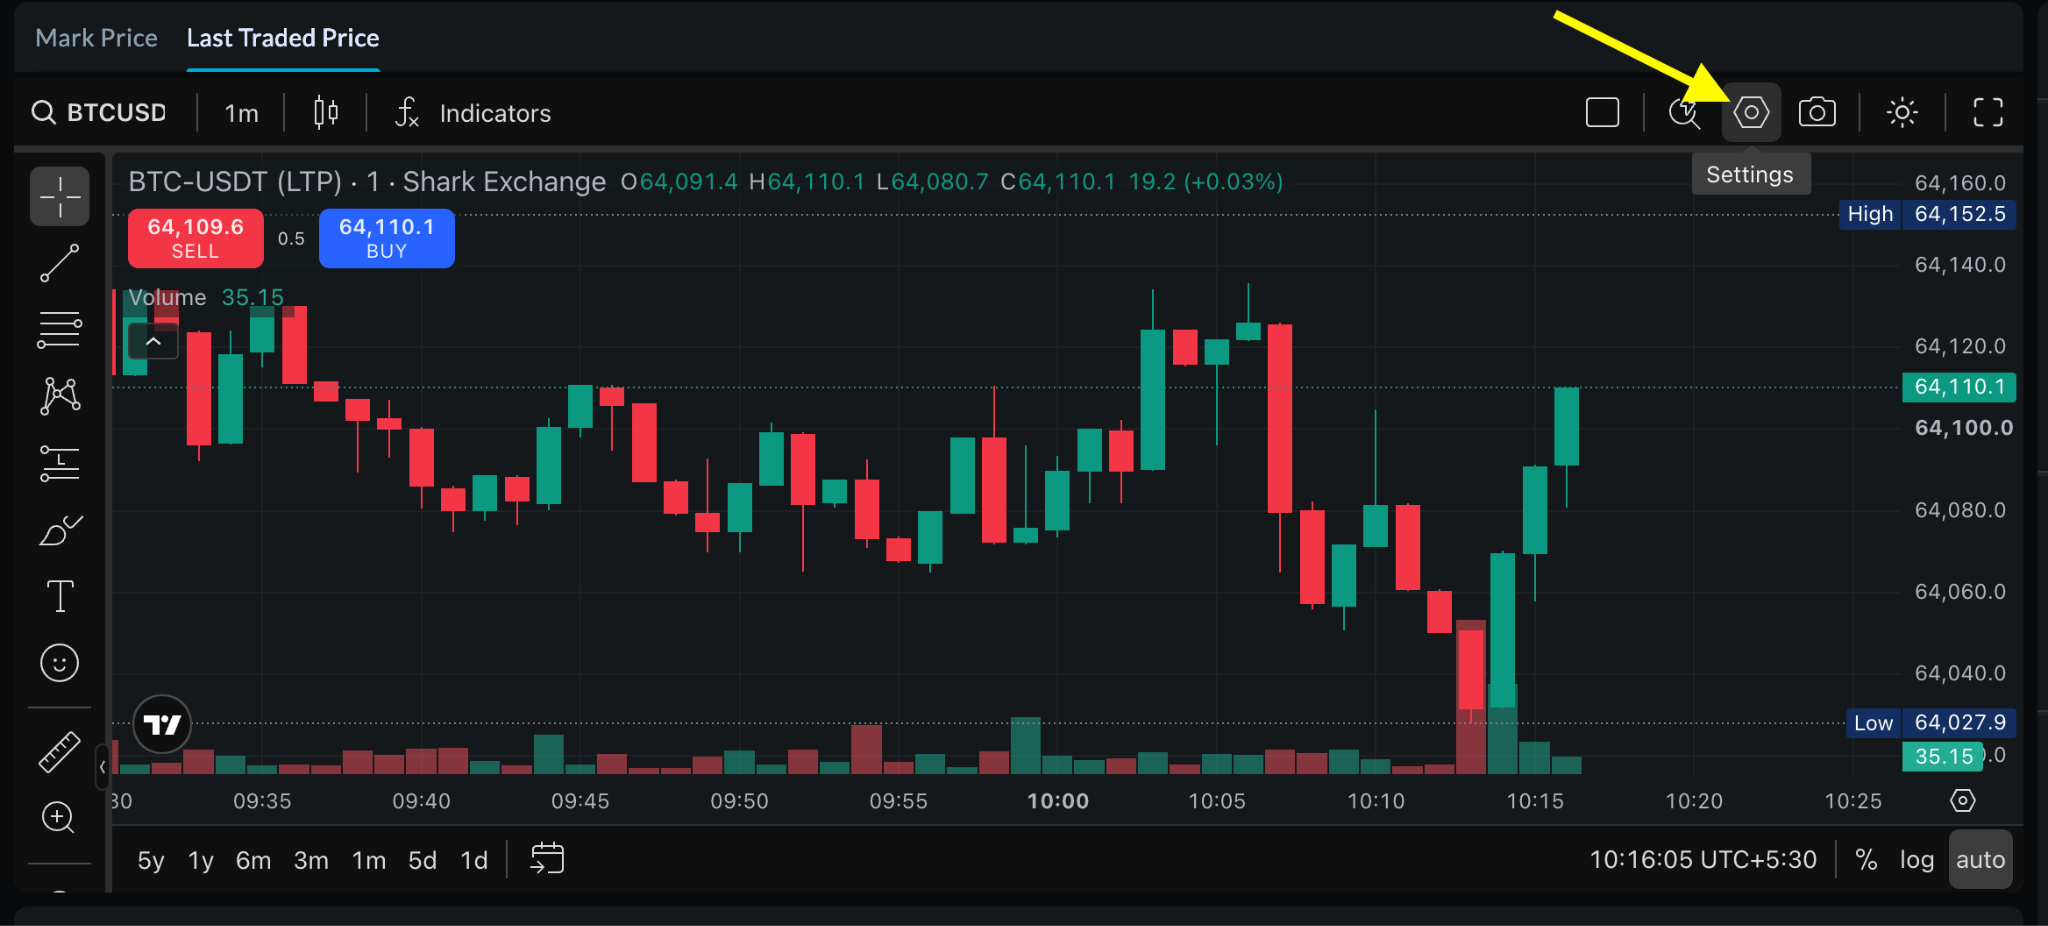
Click the Settings icon (a hexagon with a circle inside it) on the chart toolbar.
In the settings menu, select the Trading tab from the list on the left.
Scroll up, check box the Reverse position button and click on okay to add the reverse button on the chart
Steps to Reversing the position
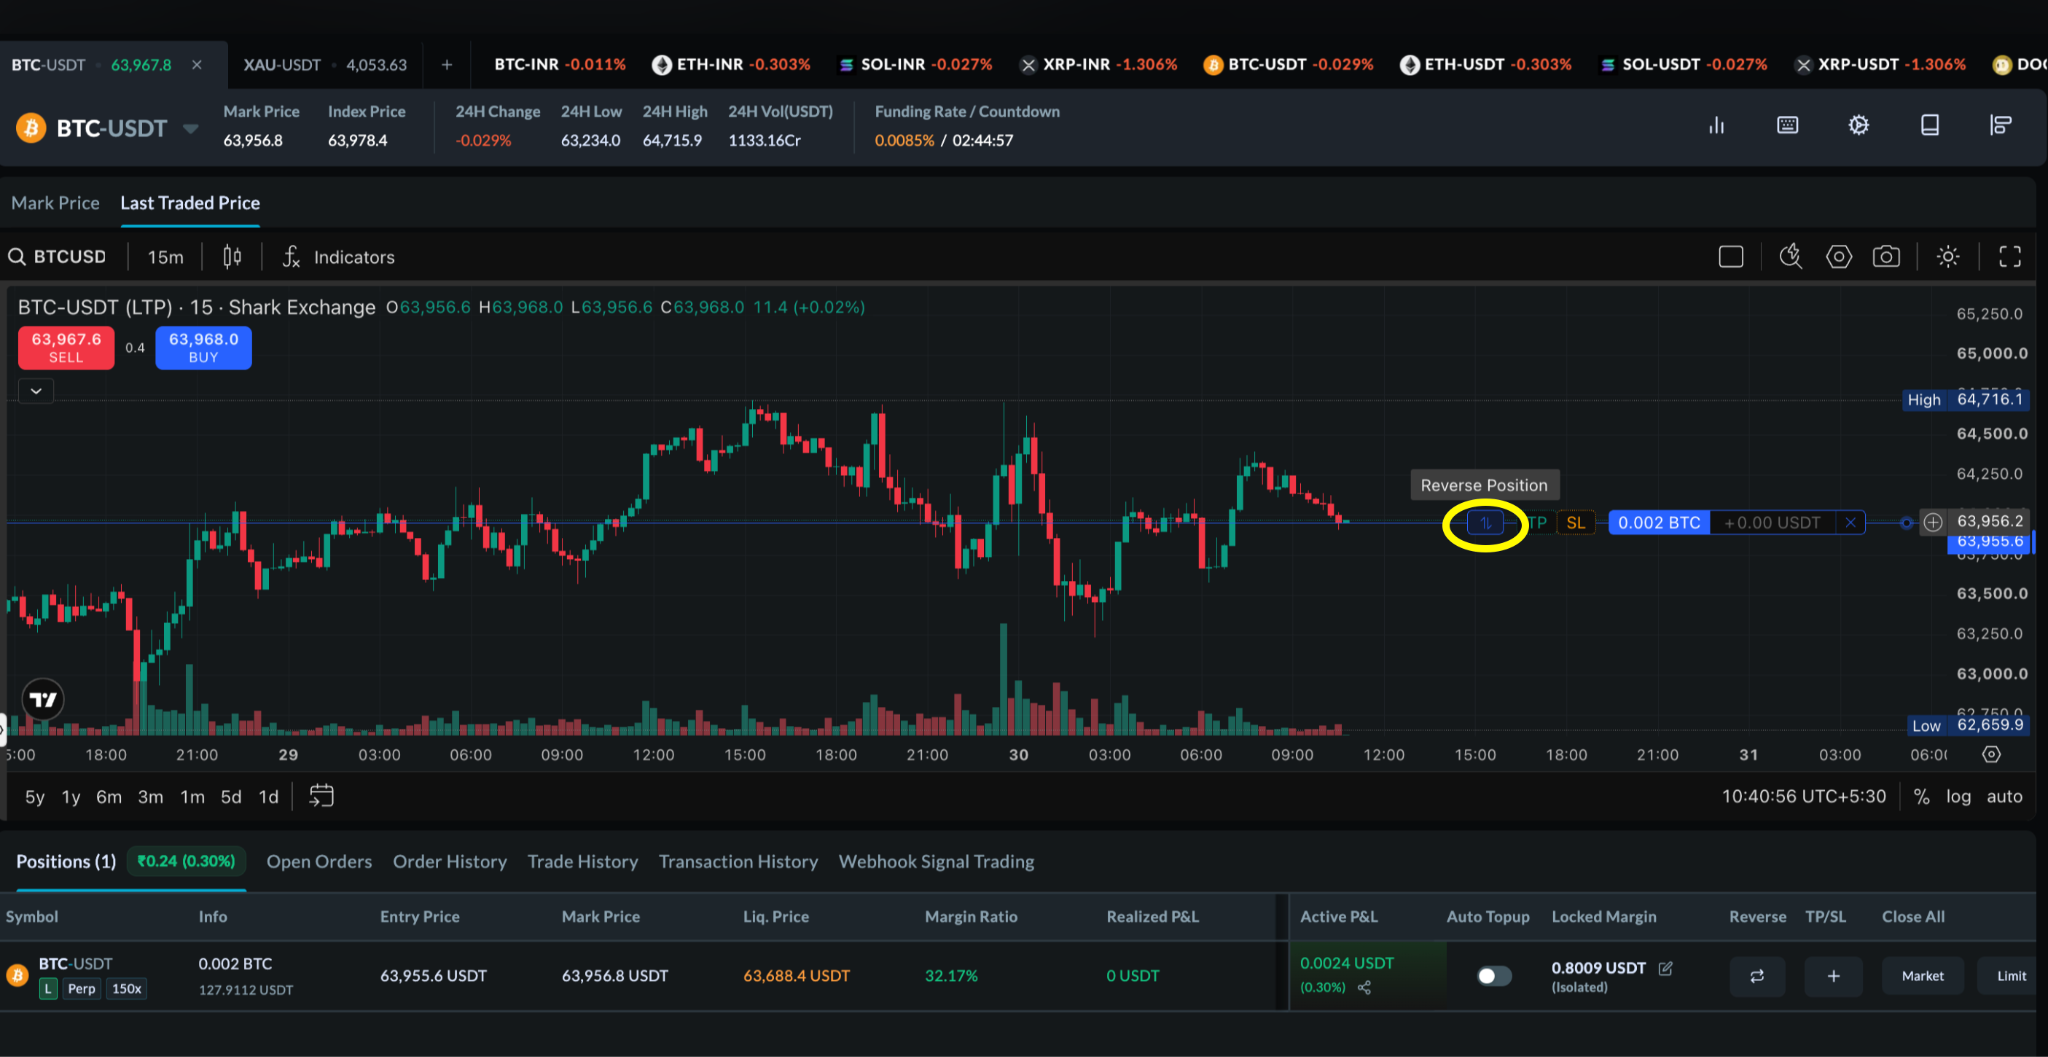
Find the Position Status button on the left side of the chart, next to your TP/SL markers.
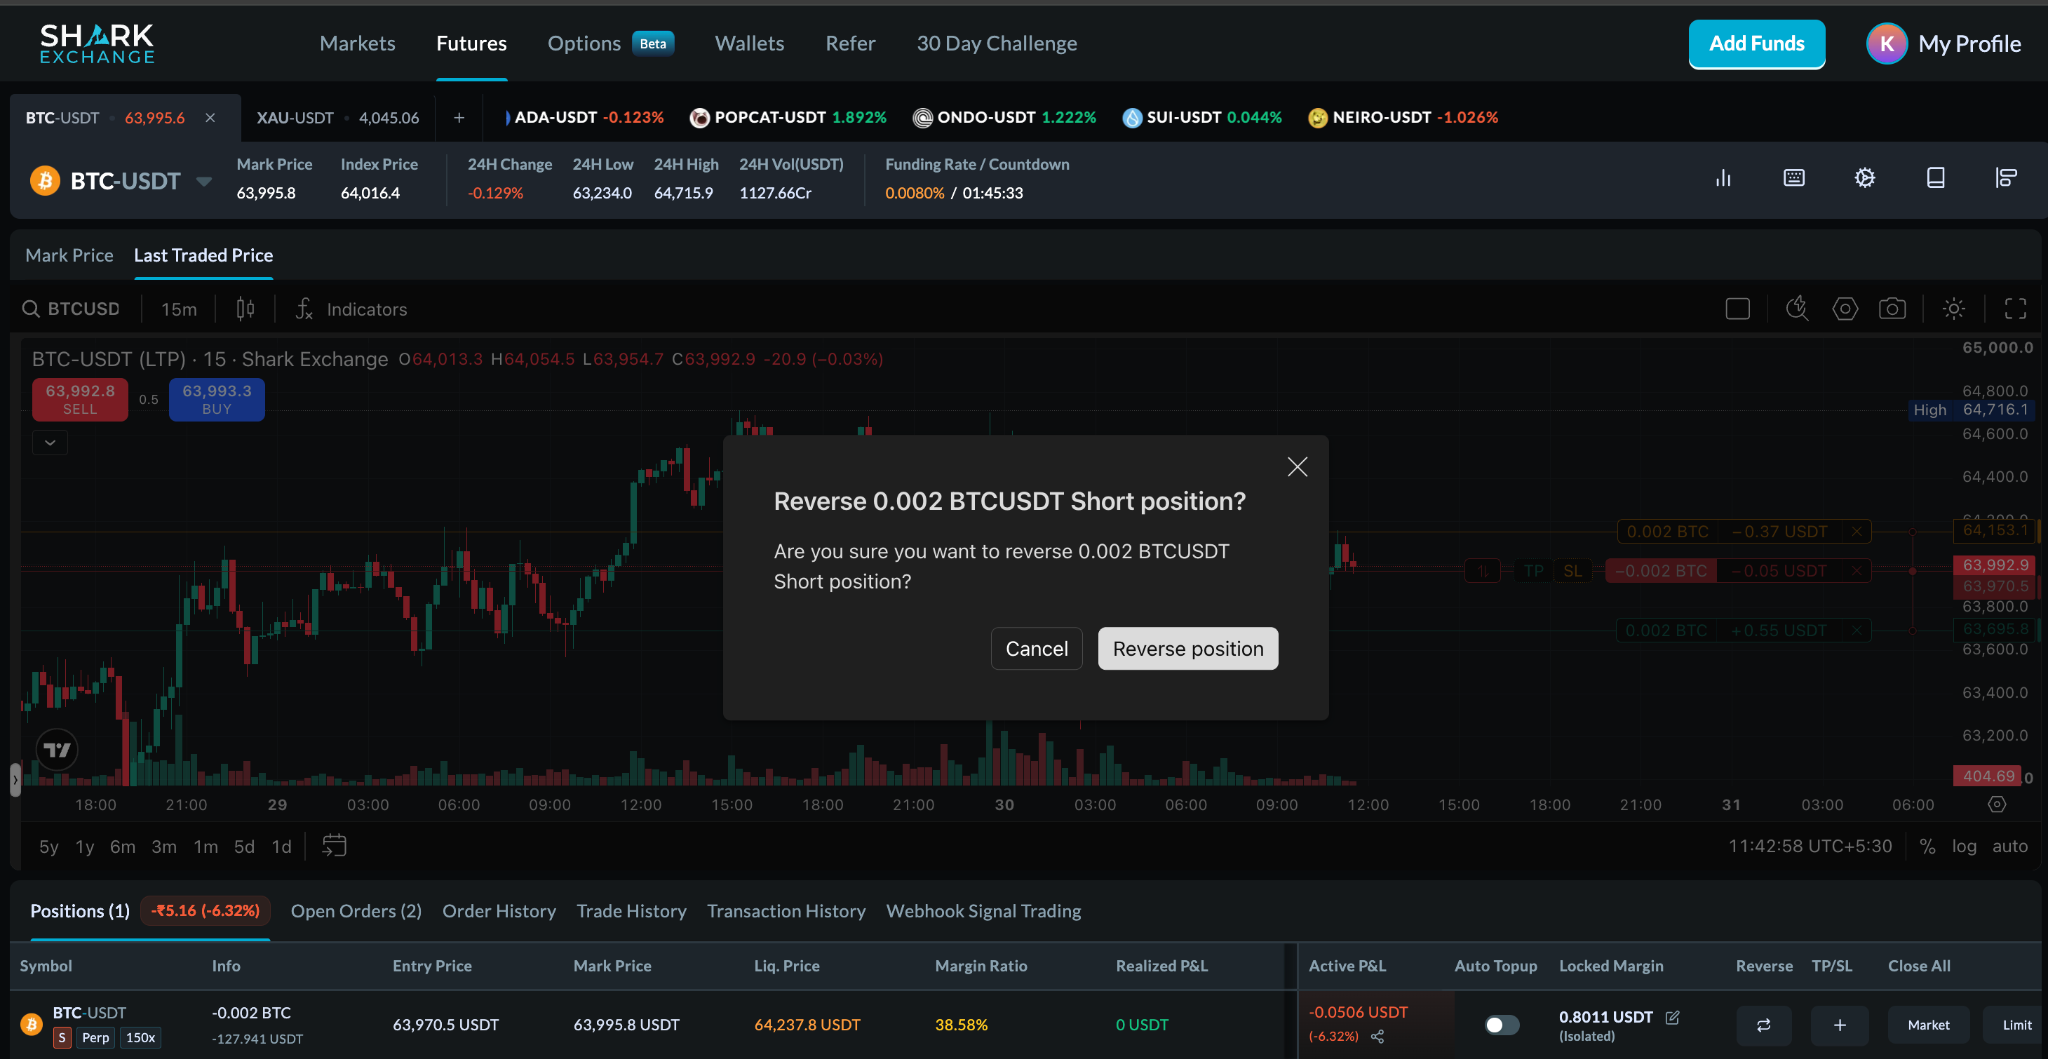
Click Reverse Position.
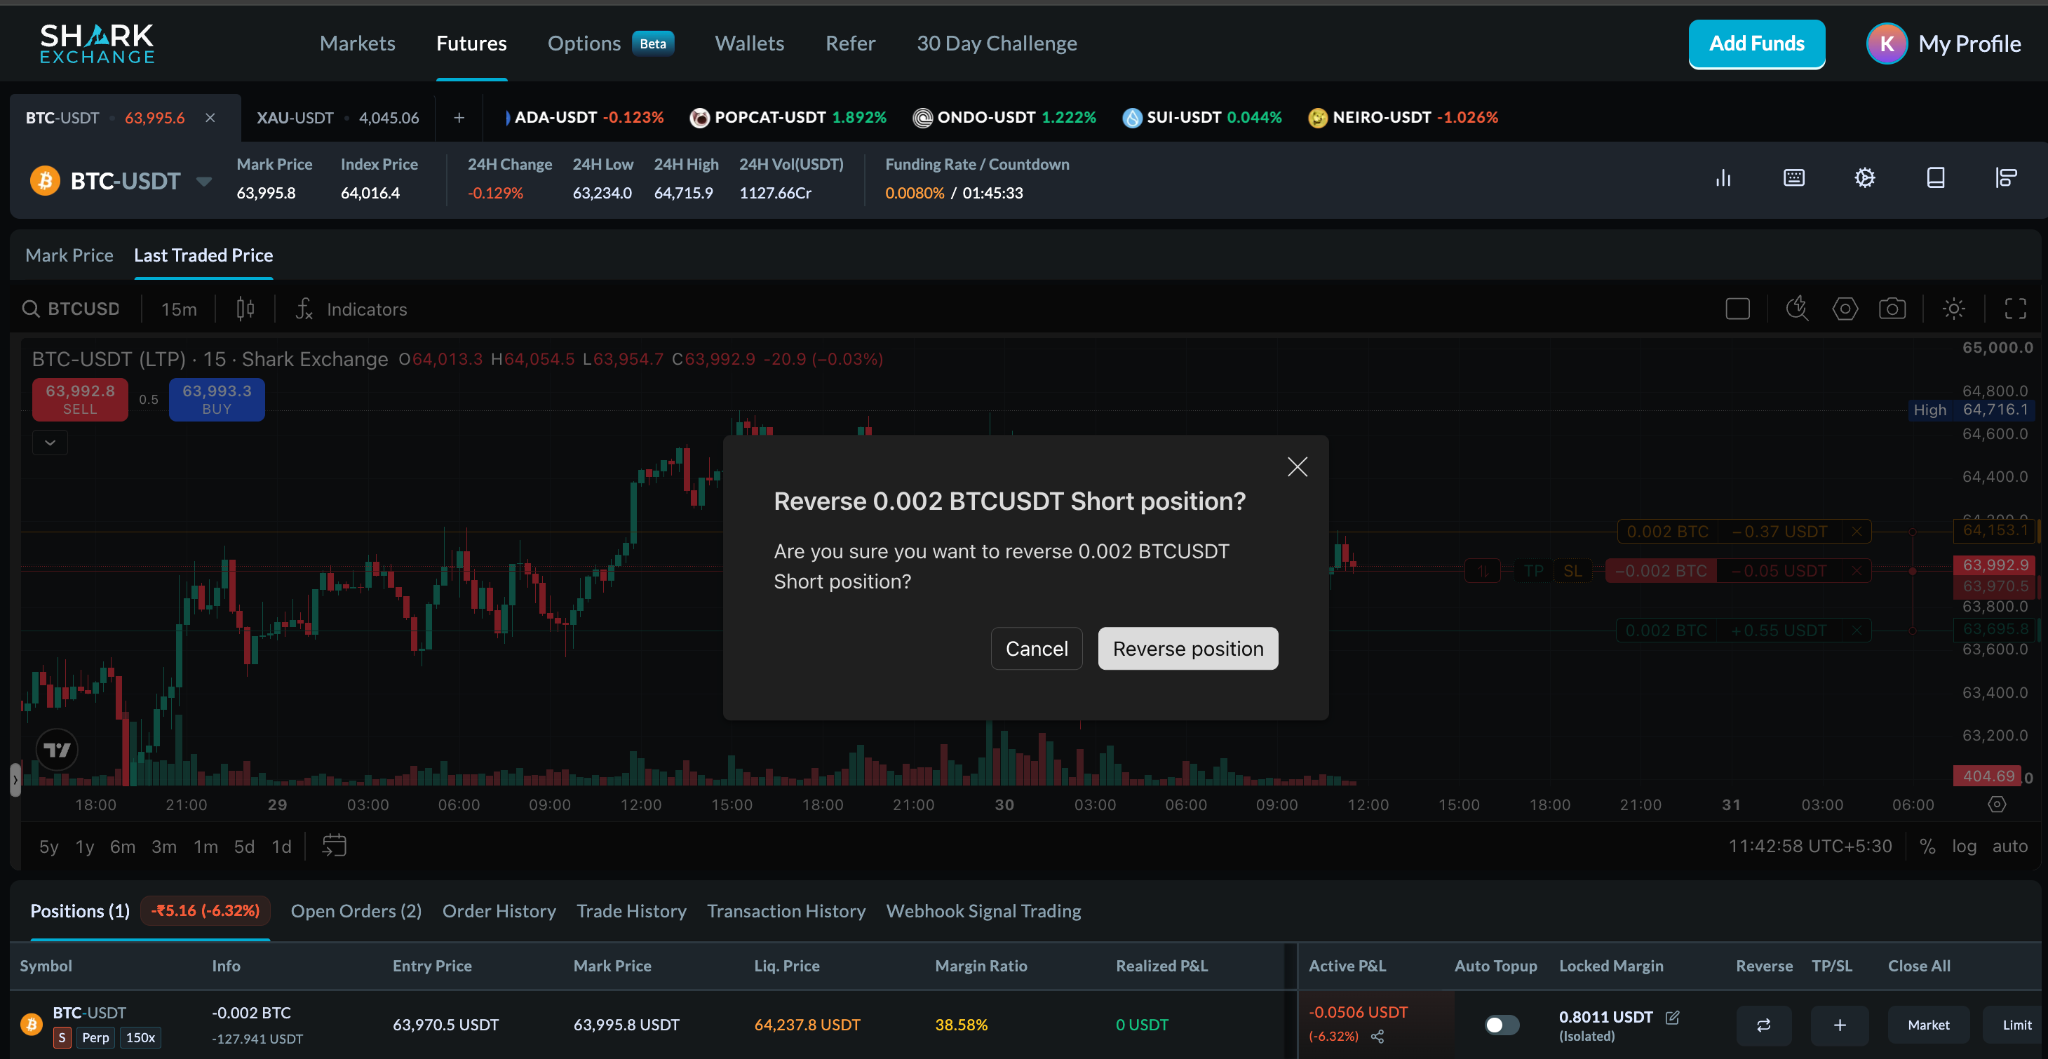
A confirmation window will show you the new trade details.
Click Verify to complete the reversal.
4. One-Click Trading
One-Click Trading removes the confirmation pop-ups, so your actions on the chart execute instantly. This is useful for fast-moving markets, but it also means there's no second chance to catch a mistake.
How to turn it on
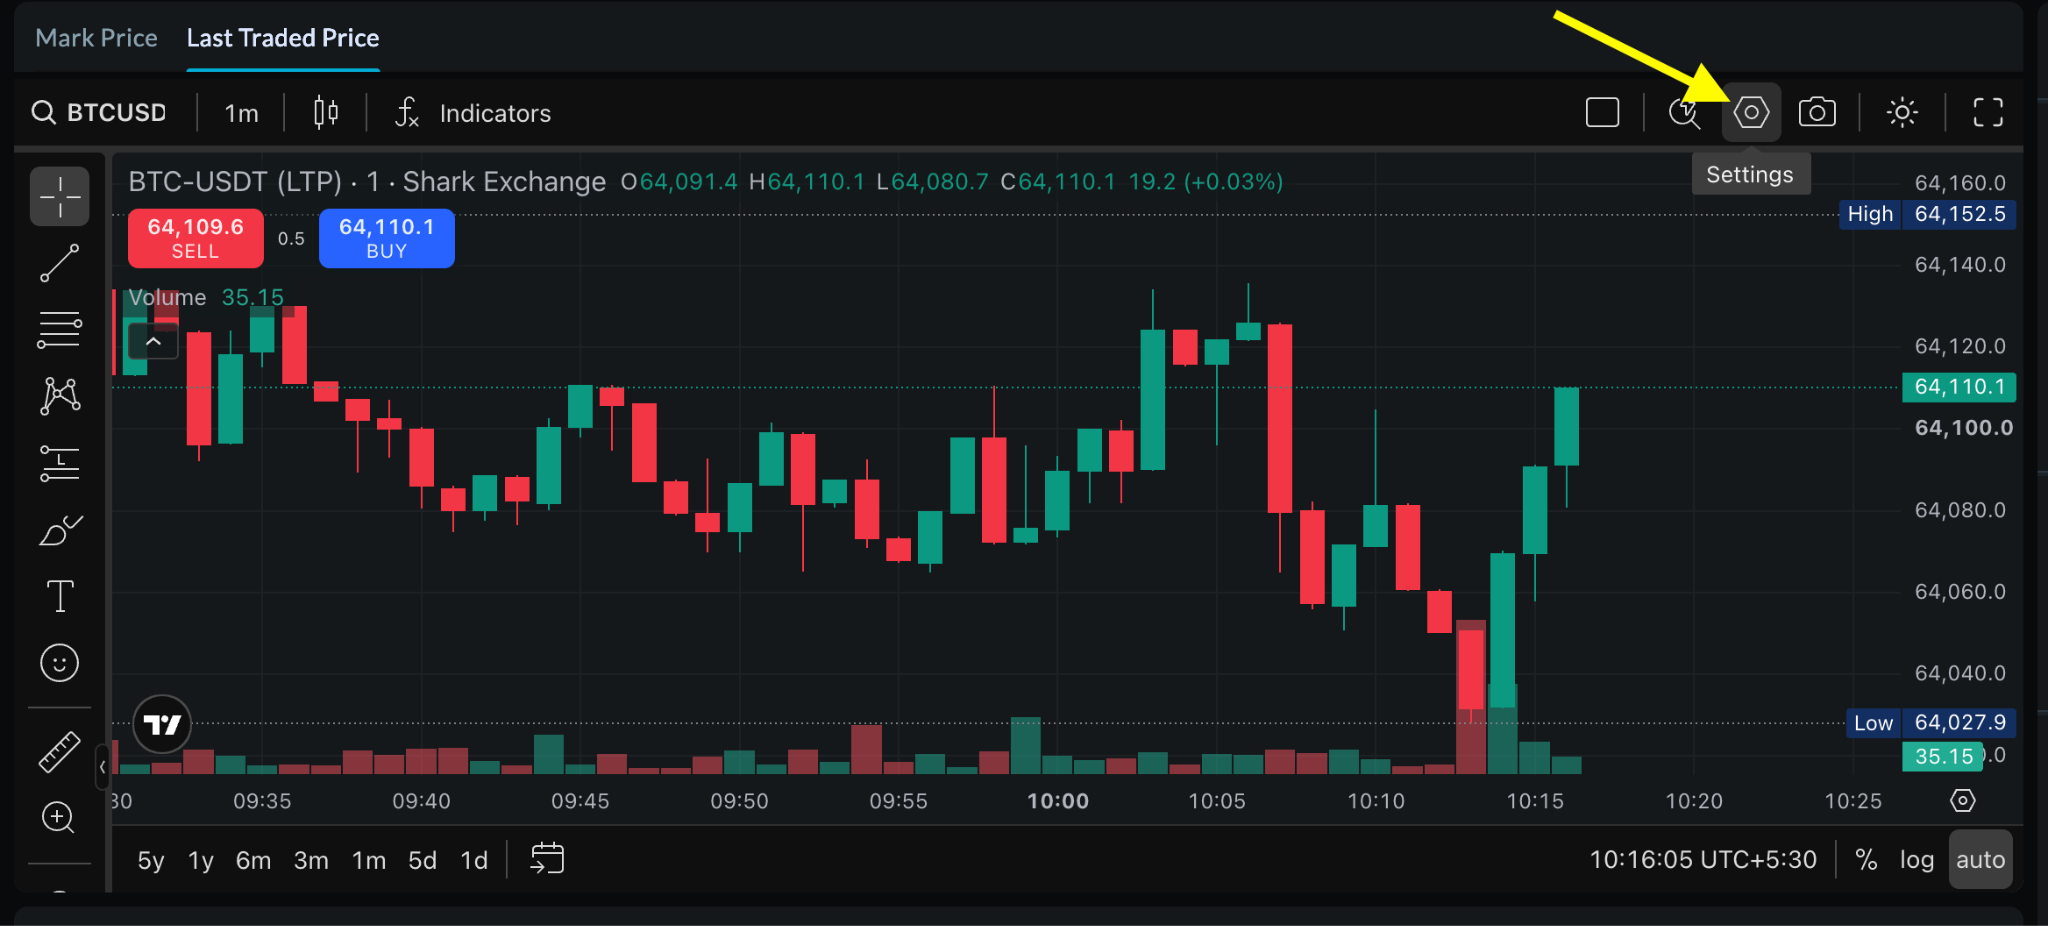
Click the Settings icon (a hexagon with a circle inside it) on the chart toolbar.
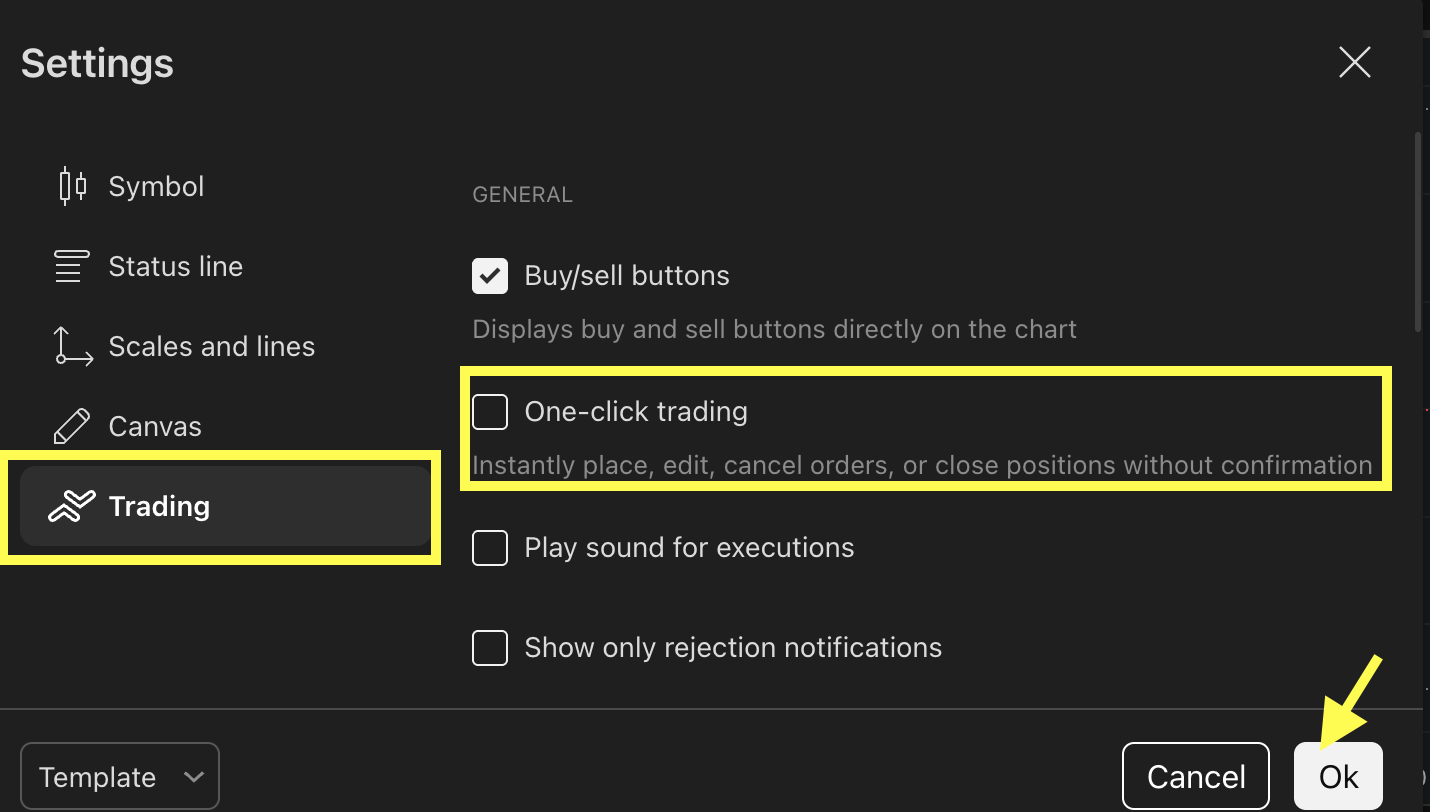
In the settings menu, select the Trading tab from the list on the left.
Toggle One-Click Trading to ON.
What changes when it's on
Clicking Buy or Sell places the trade immediately at the current market price.
Dragging a TP or SL line updates the price the moment you release it.
Clicking Cancel Order or Close Position executes right away.
⚠ Warning:
With One-Click Trading turned on, every action on the chart happens immediately — there is no confirmation step. Only enable this if you are confident reading the chart and are certain about each click before you make it.
5. Multiple Take Profit & Stop Loss Levels
Instead of exiting your whole position at one price, you can scale out gradually across several price points. You can set up to 5 Take Profit levels and 5 Stop Loss levels (10 in total).
Steps
Confirm One-Click Trading is OFF in Settings.
With your position open, drag the TP or SL line to your first target price.
From the prompt menu that appears, select Add Level.
Adjust the Quantity for this tier. Note: the first tier defaults to 100% of your position — you'll need to lower it manually to leave room for the other tiers.
Repeat the process to add further levels, up to 5 Take Profit and 5 Stop Loss levels in total.
To fine-tune a tier's size, hover over its quantity field and scroll.
Video Link: How to place multiple SL/TP orders9For reference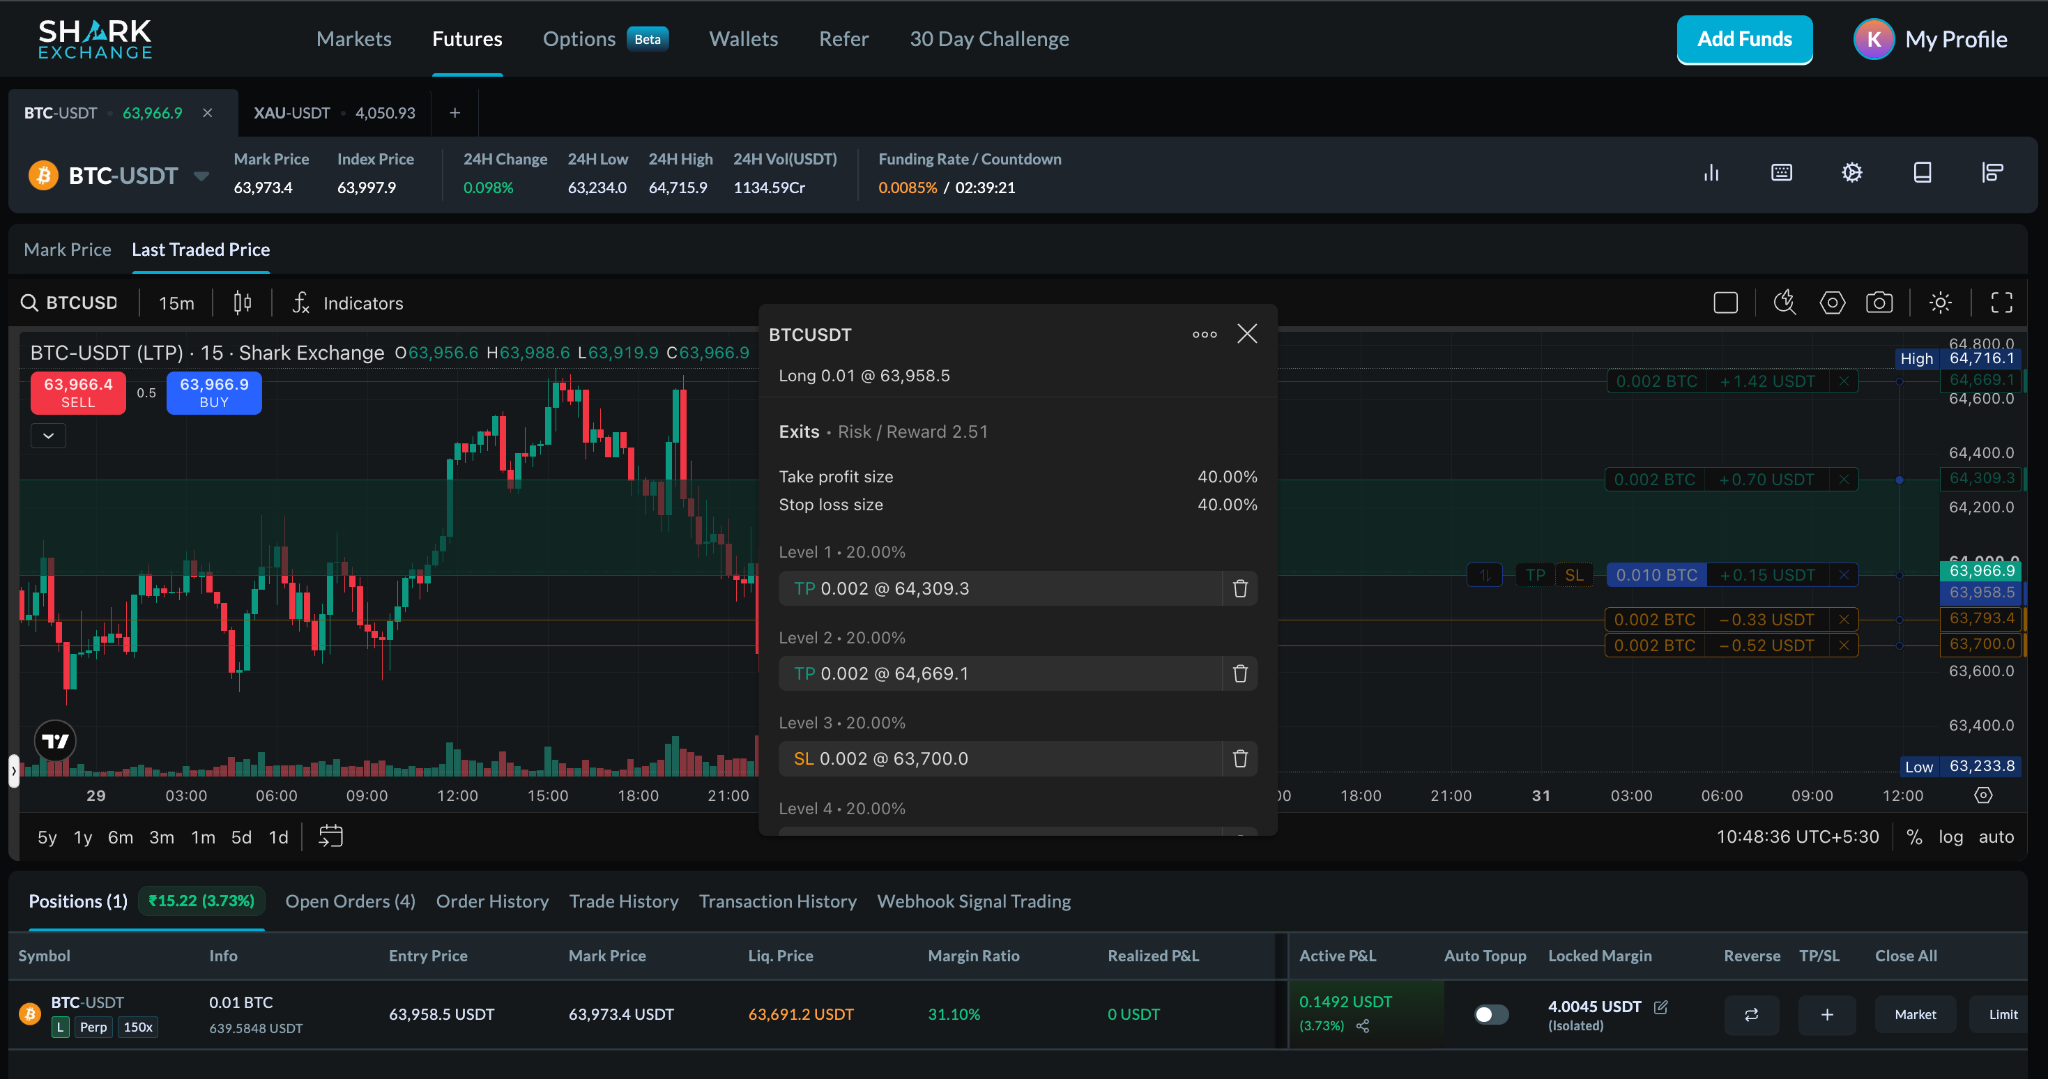
Quick Reference
Was this article helpful?
That’s Great!
Thank you for your feedback
Sorry! We couldn't be helpful
Thank you for your feedback
Feedback sent
We appreciate your effort and will try to fix the article